Guides / Technical
Burr Control on Medical Parts: Deburring Methods and How to Write the Acceptance
October 13, 2026
A burr is a small ridge or flake of metal left on an edge after cutting. On a medical part it can tear tissue, shed into a wound, snag a mating part or hide under a coating. Deburring is cheap to specify badly and expensive to correct later. This guide covers the methods, which features each reaches and how to write an acceptance that a shop can meet and an inspector can check.
Where burrs come from
Burrs form wherever a cutting edge leaves the material: the exit side of a drilled hole, the start and end of a thread, the cut-off face of a turned part and the edges of milled pockets and slots. Ductile materials such as 316L and CP titanium tend to make larger, tougher burrs that fold over the edge, while harder alloys leave smaller burrs that can be sharper. Burrs also form inside cannulations and at the intersection of cross holes, where nobody can see them.
Two kinds matter in practice. A fixed burr is still attached and sharp. A loose burr is a fragment that can detach later, in cleaning, handling or use. Medical acceptance is mostly about both, with the loose burr being the larger risk.
The main deburring methods
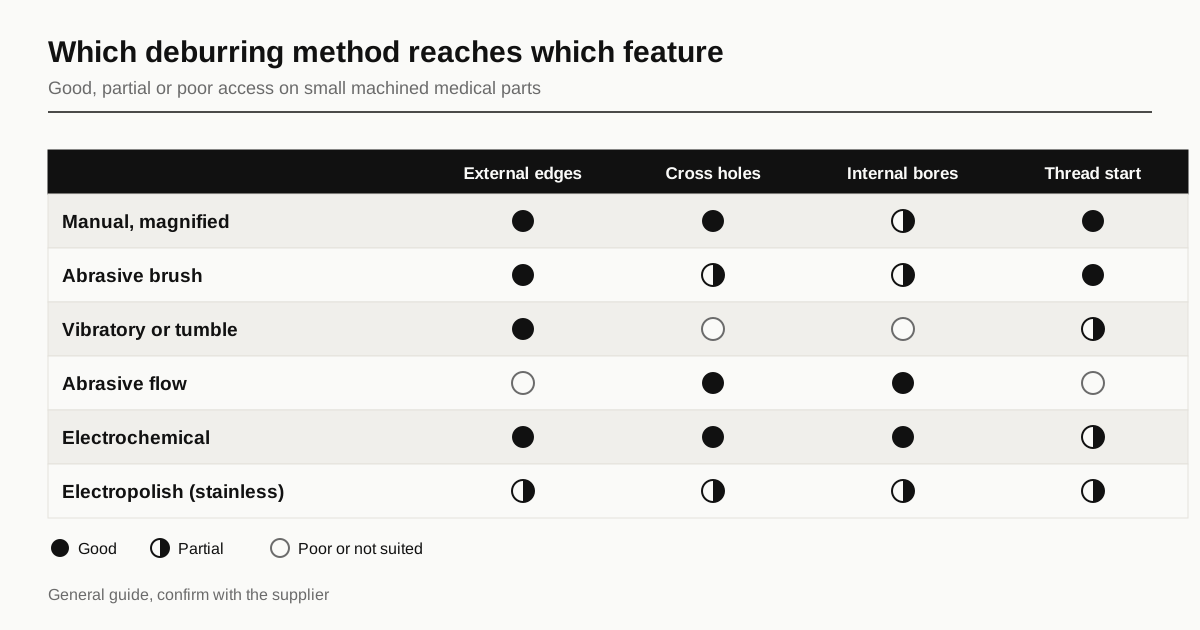
| Method | Reaches well | Reaches poorly |
|---|---|---|
| Manual under magnification | Accessible edges, small features | Internal bores |
| Abrasive brush | External edges, thread starts | Blind holes, deep cross holes |
| Vibratory or tumble finishing | Many small parts at once, external edges | Hidden features, fine threads at risk |
| Abrasive flow | Internal passages and cross holes | External edges |
| Electrochemical deburring | Targeted edges and intersections | Large areas, needs tooling |
| Electropolish | Micro burrs, general surface | Heavy burrs, deep recesses |
Manual deburring uses a scalpel, a pick or a rotary tool under a microscope. It is slow and variable, but it is often the only way to reach a feature on a small part.
Brush deburring uses abrasive filament brushes on the machine or on a bench. It suits external edges and thread starts, and the settings need control to avoid rounding a thread flank.
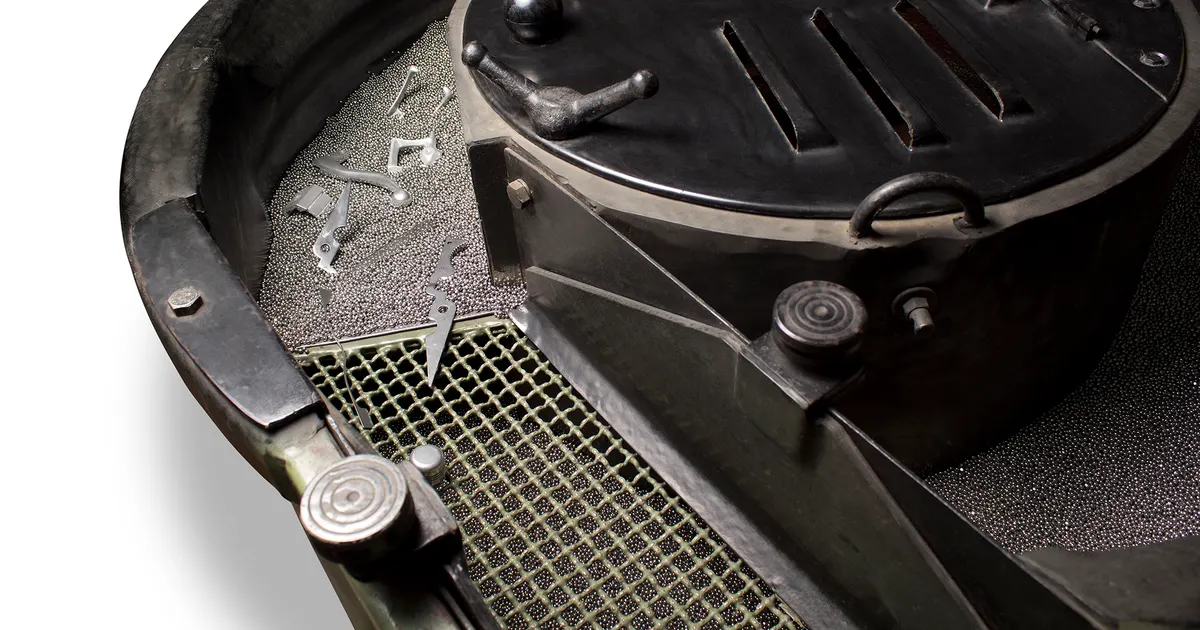
Vibratory and tumble finishing put parts in a bowl or barrel with media. It deburrs many parts at once and leaves a uniform edge, but parts can strike each other, and small, delicate parts need separators or fixtures.
Abrasive flow machining pushes an abrasive-laden medium through a passage. It works on internal features that no tool reaches.
Electrochemical deburring dissolves the burr with a controlled current through a shaped tool. It targets one edge without touching the rest.
Electropolish removes a thin surface layer from stainless steel and rounds micro burrs. It is not a substitute for deburring a heavy burr. Our guide to passivation and electropolish covers when it fits.
Titanium and thermal deburring
A thermal method that burns burrs off with a gas explosion is common on steel and aluminium parts. Titanium is reactive and needs care, so shops generally choose a mechanical or electrochemical method for it. If a quote lists a thermal step for a titanium implant, ask how the shop controls the surface afterwards.
Writing the edge condition on the drawing
Many drawings say “break all sharp edges” and stop there. That note is a risk for the buyer, because it leaves the limit to the shop. A better drawing does three things.
- States a range. A minimum and maximum edge break, for example 0.1 to 0.3 mm, so a shop cannot leave a razor edge or take off a fit-critical feature.
- Names the exceptions. Edges that must stay sharp, such as cutting edges, and edges that need a tighter limit.
- Uses a recognised notation. ISO 13715 gives symbols for edges of undefined shape, with burr and edge-break limits. Check the current edition.
The edge break for a part also has to match the next step. Passivation, coating and laser marking all behave differently over a sharp edge than over a broken one. Read the tolerance guide for how callouts on edges and dimensions interact.
How burrs are inspected
The standard approach is visual inspection under magnification, with a defined light. Ten times magnification is common, and some customers ask for more on critical features. The inspection instruction should state:
- the magnification and lighting
- which features are inspected on every part and which on a sample
- what counts as a defect, for example any burr visible at the stated magnification, any raised edge that catches a probe, any loose particle
- what happens to a rejected part, either reworked by a named method or scrapped
A touch or probe test supplements the visual check on internal features. Some programmes also run a particle extraction test after cleaning. A fingernail drag or a cotton swab is a quick screen at the bench, but it leaves no record, so it cannot be the inspection of record.
Burrs inside holes and cannulations
The hardest burrs are the ones nobody can see. A cannulated screw has a long small bore, and a cross hole drilled into that bore leaves a burr on the inside where the two meet. A borescope can show it, and an abrasive flow or electrochemical step can remove it, but only if the process plan names it. If the drawing is silent about internal edges, a shop will often treat them as out of scope.
Three questions help here. Does the function care about the internal edge, for example because a guide wire passes through? Can the shop inspect it, and with what tool? And does the cleaning process after deburring have a way to flush loose particles out of a blind bore? A burr removed by a good method can still lodge in a blind hole if the rinse does not reach it. See cleaning validation for machined implants for how that stage is proven.
Build a staged plan
Good shops do not rely on one method. A typical plan for a small stainless or titanium part looks like this:
- Prevent. Choose tool paths and exit strategies that leave a smaller burr in the first place. Cheaper than any later step.
- Remove the bulk. Brush or tumble to break the external edges.
- Reach the hard features. Manual, abrasive flow or electrochemical work for cross holes and bores.
- Finish the surface. Electropolish or a final polish, where the drawing asks for it.
- Inspect. Magnified visual inspection of the listed features, with a record.
- Clean. A validated cleaning step to remove loose particles and media.
Asking a shop for this plan, in writing, tells you more about its process than any capability list. A shop that answers with one sentence about “hand finishing” has not thought about the cross holes yet.
Cost and risk
Deburring is a labour step on most small parts, and it often costs more than the cutting itself. Three choices change the price: how many features need manual work, whether the inspection is on every part or on a sample and whether rework is allowed. A part with twelve cross holes and a long cannulation can take far longer to deburr than to cut. Shops that quote this step as a line item make it easy to compare.
What to ask a shop
- Which method do you use on each burr-prone feature?
- Is deburring a validated or a verified process, and who inspects it?
- What magnification and acceptance do you use?
- How do you reach cross holes and cannulations?
- Does the process change thread or fit dimensions, and how is that checked?
The common mistakes article lists several drawing gaps that start here.
We match buyers with machining suppliers and the buyer pays us nothing. We do not machine or deburr parts and we do not qualify a supplier for you, because that stays in your own quality system. To send a drawing, request a quote and we reply within 24 business hours.
Sources
- ISO 13715, technical product documentation, edges of undefined shape, indication and dimensioning
- ISO 13485:2016, medical devices, quality management systems (clause 7.5.2, cleanliness of product)
Standards and regulations change. Check the current text at the source before you rely on it in a submission.
Frequently asked questions
What edge break should I put on a medical part drawing?
State a range, not just a note to break sharp edges. A range such as 0.1 to 0.3 mm tells the shop both the minimum and the maximum, and it can be checked. The right figure depends on the function: a sealing edge, a soft-tissue contact edge and a mating edge each need something different.
Is hand deburring acceptable for implants?
Yes, when it is a controlled operation. A trained operator with a defined tool, magnification and a written work instruction can deburr small features no machine reaches. The risk is variation between operators, so the instruction and the inspection step carry the weight.
Can a part be too deburred?
Yes. Over-deburring rounds edges that need to stay sharp, such as cutting flutes or sealing lands, and it can change a fit or thread. The drawing should say which edges stay sharp as well as which to break.
Need a quote for this part?
Send the drawing. We match you with up to 3 medical machining suppliers and reply within 24 business hours.
Get matched with a medical machining supplier